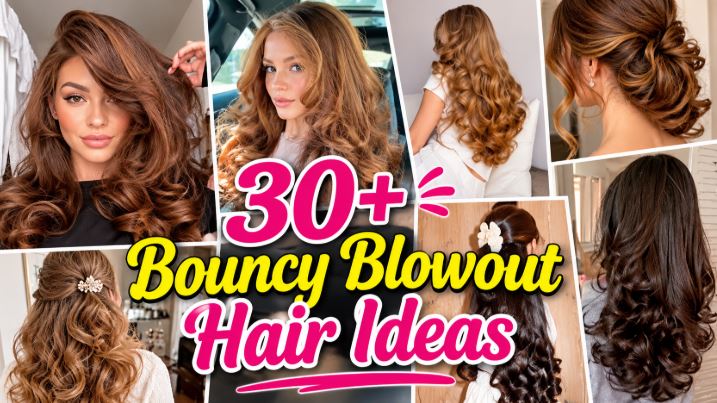
Learn how to get a bouncy blowout at home. Step-by-step guide for short and long hair, the newest 2027 blowout trends, the mistakes that flatten your volume, and how to make it last for days.
You know that moment when someone walks past you and her hairstyles moves like it has its own soundtrack? Lifted at the roots, glossy from top to bottom, and curving under at the ends like she just stepped out of a 1990s runway show.
That is the bouncy blowout, and right now it is one of the most requested looks in the hair world. The best part is that you do not need a salon appointment to get it. You need the right tools, the right order of steps, and one small trick most people skip (we reveal it in Step 7, so keep reading).
In this guide you will get:
- What a bouncy blowout really is
- The latest 2026 updates and why demand is exploding
- A quick table to find the version that suits your hair
- A detailed step-by-step method for long hair and for short hair
- The 5 mistakes that make your blowout go flat in an hour
- How to keep it fresh for 2 to 4 days
Save this post to your Glow Up board now, because you will want to come back to it before your next event.
What Is a Bouncy Blowout?
A bouncy blowout is a voluminous, retro, 90s-inspired hairstyle with shiny, buoyant waves, lifted roots, and smooth, curved ends. Think supermodel hair from the 1990s: full, glossy, and swingy, but with a modern, softer finish.
Three things define the look:
- Lift at the roots. The hair does not lie flat against the scalp.
- Movement through the lengths. Soft, open waves or a gentle bend, not stiff curls.
- Polished ends. Smooth ends that curve under or flick out slightly, depending on your preference.
The 2027 version is not the stiff, over-sprayed style of the early 2000s. Stylists describe the current look as polished but lived-in, like you woke up that glamorous.
Why Bouncy Blowouts Are in Huge Demand Right Now
If your feed feels full of big, bouncy hair lately, it is not your imagination. Here is what is happening in the hair world as we move through late 2026:
- Salons report strong demand. Celebrity stylists have said the big, voluminous blowout is among the most requested looks at the salon this season, and winter 2026 trend roundups name the big bouncy blowout as the headline hairstyle of the season.
- The 90s comeback is still going. Supermodel-era glamour, especially the bouncy, brushed-out look, keeps returning through fashion shows and red carpets. In 2026 it is less about copying a decade and more about capturing the feeling.
- Blow dry bars are opening. New blow dry bars are appearing in major cities, built around the idea that people want a small self-care moment even without a special occasion. Owners say big, bouncy hair is more in demand than ever.
- Heat tools made it easy at home. Multi-styling tools such as the Dyson Airwrap and Shark FlexStyle have helped bring the salon blow-dry look into regular routines.
- New names for new versions. Stylists have introduced the bubble blowout (more volume and a rounded, bubble-like shape toward the ends) and the rich girl blowout (sleek, high-shine, expensive-looking volume), both pushing beach waves out of the spotlight.
- Health matters now too. The 2026 message is that healthy, glossy hair is the goal, so heat protectant and shine finishing are part of the trend, not an afterthought.
Why this matters for you: Because search interest and salon demand are both rising, this is the perfect time to learn the style. It also means lots of people are looking for tutorials right now.
Which Bouncy Blowout Is Right for You?
| Style Name | The Look | Best For | Difficulty |
|---|---|---|---|
| Classic 90s Supermodel Blowout | Big root lift, flipped or curved ends | Medium to long hair, layers | Medium |
| Bubble Blowout | Rounded volume, bubble shape at the ends | Straight to wavy hair, shoulder length and longer | Medium to hard |
| Rich Girl Blowout | Sleek, glossy, polished volume | Anyone who loves a smooth finish | Medium |
| Bouncy Bob Blowout | Chin-length bouncy volume, brushed-out texture | Short hair, bobs, lobs | Easy |
| Soft Bend Blowout | Gentle bend instead of flat straight hair | Beginners, daily wear | Easy |
| Your Hair Type | What to Focus On | Product Tip | Brush Size |
|---|---|---|---|
| Fine / flat hair | Maximum root lift, light products | Use a lightweight volumizing mousse; avoid heavy oils at the roots | Medium round brush |
| Thick hair | Controlling density, smoothing before shaping | Smoothing shampoo and a heat protectant; oil only on the ends | Large round brush |
| Wavy hair | Stretching waves smooth first | Smoothing cream plus heat protectant | Large round brush |
| Straight hair | Adding bend and bounce | Texture or volume spray at the roots | Medium to large brush |
| Short hair / bobs | Rounded shape and lift | Light mousse and a small amount of finishing spray | Small to medium brush |
Bouncy Blowout for Different Hair Types
| Your Hair Type | What to Focus On | Product Tip | Brush Size |
|---|---|---|---|
| Fine / flat hair | Maximum root lift, light products | Use a lightweight volumizing mousse; avoid heavy oils at the roots | Medium round brush |
| Thick hair | Controlling density, smoothing before shaping | Smoothing shampoo and a heat protectant; oil only on the ends | Large round brush |
| Wavy hair | Stretching waves smooth first | Smoothing cream plus heat protectant | Large round brush |
| Straight hair | Adding bend and bounce | Texture or volume spray at the roots | Medium to large brush |
| Short hair / bobs | Rounded shape and lift | Light mousse and a small amount of finishing spray | Small to medium brush |
What You Need (Tools and Products Checklist)
| Item | Why You Need It | Must-Have? |
|---|---|---|
| Heat protectant | Protects hair so the shine looks healthy, not fried | Yes |
| Volumizing mousse or foam | Builds body from the roots | Yes |
| Blow dryer with a nozzle | Directs air for smooth, shiny hair | Yes |
| Round brush (size matters) | Creates the curve and bounce | Yes |
| Sectioning clips | Keeps hair controlled | Yes |
| Velcro rollers or hot rollers | Locks in volume and the bouncy shape | Highly recommended |
| Lightweight hairspray | Holds the shape without crunch | Yes |
Step-by-Step: Bouncy Blowout for Long Hair
Step 1: Start With Clean, Prepped Hair
Wash with a shampoo that suits your hair (a smoothing one for thick hair, a volumizing one for fine hair). Gently squeeze out water with a microfiber towel or old t-shirt. Do not rub, because rough towel drying roughs up the hair cuticle and creates frizz before you even start.
Why it matters: A good blowout starts with a smooth base. Frizz at this stage will show up later.
Step 2: Apply Your Prep Products
With damp hair, apply heat protectant from mid-lengths to ends. Then work a coin-sized amount of volumizing mousse through the roots and mid-lengths. Comb it through with a wide-tooth comb so it is evenly spread.
Why it matters: Heat protectant guards your hair. Mousse gives the roots something to hold onto. Skip either one and the result is flatter or more damaged.
Step 3: Rough Dry to 80 Percent Dry
Before you pick up the round brush, rough dry the hair with your fingers and the dryer until it is about 80 percent dry. Flip your head upside down for a minute to boost the roots, then bring it back up.
Why it matters: Trying to brush-style soaking wet hair takes forever and strains your hair. Working with damp, not wet, hair is faster and gives better bounce.
Step 4: Section Your Hair Like a Pro
Part your hair and divide it into at least 4 sections: two on top, two at the back. For thick hair, use 6 sections. Clip them up securely. You will work on one section at a time, starting at the bottom back.
Why it matters: Small sections are the secret to smooth, shiny hair. Big chunks stay half-styled.
Step 5: Build Lift at the Roots
Take a 2 to 3 inch section. Place the round brush at the root, lift the hair up and away from the scalp, and point the dryer nozzle down the hair shaft (from root to end). Hold for a few seconds at the root so the hair dries lifted.
Why it matters: The direction of the airflow matters. Pointing the dryer down the hair shaft keeps the cuticle flat, which creates shine instead of frizz.
Step 6: Roll and Curve the Ends
Slowly pull the brush through the length, rotating it to curve the ends under (for a classic look) or flipped outward (for a bolder 90s look). Do a second pass if the section is not smooth.
Why it matters: The slower you go, the smoother the result. Rushing leaves bumps and flyaways.
Step 7: The Secret Step: Cool Shot and Set
This is the step that keeps your volume alive. After you style each section, hit it with the cool shot button while the hair is still wrapped on the brush. Hold for 5 to 10 seconds, then release. For extra lasting power, wrap the finished section around a velcro or hot roller and leave it while you style the rest.
Why it matters: Hair sets into its new shape as it cools. Skip this and the bounce drops within the hour.
Step 8: Release, Loosen, and Shape
Remove the rollers once they are completely cool. Do not brush straight through. Use your fingers or a wide-tooth brush to gently loosen the curls into soft, bouncy waves.
Why it matters: Brushing too hard right away turns bounce into frizz.
Step 9: Finish With Shine and Hold
Press a tiny amount of shine serum or hair oil onto the ends only. Then mist a lightweight hairspray from about 10 inches away, lifting the roots as you spray.
Why it matters: Shine is what makes the blowout look expensive. A light hairspray holds the shape while still letting the hair move.
Step-by-Step: Bouncy Blowout for Short Hair
Short hair (bobs, lobs, chin-length cuts) is actually one of the best canvases for a bouncy blowout, because the volume looks bigger and the shape looks intentional.
Step 1: Prep Light
Short hair gets weighed down quickly. Use only a small amount of lightweight mousse at the roots and a little heat protectant. Skip heavy creams.
Step 2: Rough Dry With a Side Part or Deep Part
Rough dry your hair to about 80 percent dryness. Use the part you plan to wear, because short hair remembers the direction you dry it in.
Step 3: Use a Smaller Round Brush
Choose a small to medium round brush. A brush that is too large will not curve short hair, and one that is too small creates tight curls instead of a soft bounce.
Step 4: Section Into Smaller Pieces
Use smaller sections (1 to 2 inches). Clip the top out of the way and start at the nape of your neck, working upward.
Step 5: Lift and Curve at the Same Time
For each section, lift at the root, point the dryer down the shaft, and roll the ends under toward your chin. For a retro flick, roll slightly outward at the bottom layers.
Step 6: Cool Shot and Hold
Hit the cool shot and hold for 5 to 10 seconds while the hair is wrapped around the brush. This is just as important on short hair.
Step 7: Add Rollers to the Crown (Optional but Powerful)
Place one or two velcro rollers at the crown for 5 to 10 minutes while you finish the rest. Short hair needs the lift at the top to look full.
Step 8: Finish Soft
Loosen the shape with your fingers, add a tiny drop of shine serum to the ends, and finish with a light mist of hairspray. Avoid heavy products, because short hair looks flat quickly if it gets coated.
5 Mistakes That Make Your Blowout Go Flat (Are You Doing These?)
| Mistake | What Happens | The Fix |
|---|---|---|
| Brushing wet hair | Takes forever, causes frizz and damage | Rough dry to about 80 percent first |
| Skipping heat protectant | Dull, dry, or damaged hair | Always apply before any heat |
| Sections that are too big | Uneven, frizzy finish | Use smaller sections with clips |
| Skipping the cool shot | Volume drops within hours | Cool each section on the brush |
| Too much product | Heavy, greasy, flat roots | Use small amounts and keep oil on the ends |
Troubleshooting: Fix Your Blowout Problems Fast
| Problem | Why It Happens | Quick Fix |
|---|---|---|
| Flat roots | Not enough lift while drying | Re-dry roots upside down and use rollers on the crown |
| Frizzy finish | Rough towel drying or dryer pointed the wrong way | Point the dryer down the hair shaft; add a drop of serum |
| Stiff, crunchy hair | Too much hairspray | Use a lightweight spray and brush through gently |
| Ends will not curve | Brush is too small or the section is too big | Switch to the right brush size and smaller sections |
| Falls out after a few hours | Hair did not cool and set | Use the cool shot and let rollers cool fully |
Make It Last: How to Keep Your Bouncy Blowout for 2 to 4 Days
- Sleep on silk or satin. It reduces friction and frizz.
- Use a loose high bun or pineapple at night to protect the volume.
- Use dry shampoo at the roots on day two to refresh lift and absorb oil.
- Re-curl the ends with a few minutes of hot rollers or a quick pass with a styling tool.
- Avoid touching your hair too often, because oils from your hands flatten it.
90s Inspiration: Make It Your Own
- Curtain bangs or face-framing layers soften the look and make the volume feel modern.
- Side part for a glamorous red-carpet vibe.
- Gloss treatment or shine spray for the high-shine finish that is trending now.
- Warm, dimensional hair color (like bronde or soft copper tones) makes the bounce look even richer.