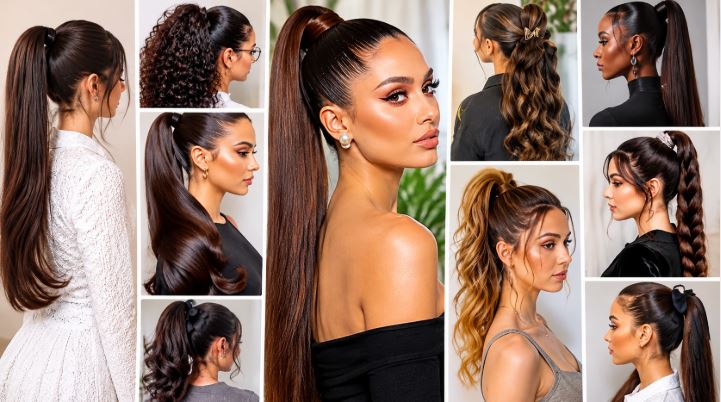
You know that girl whose hair always looks effortlessly perfect, like she woke up and the braid just fell into place? Here is the secret: it was never effortless. A messy braid is a technique, and once you know the small steps most tutorials skip, you can copy it in 10 minutes. In this guide you will get six messy braid hairstyles, each explained step by step, plus the one mistake that ruins most messy braids (it is in Look 2, so keep reading).
Want that effortless glow up hair? These messy braid ideas work for long hair, weddings, lehnga, curly hair and more. Save this for your next hair day.
Why Messy Braids Are Still in Demand
Soft, undone hair keeps growing in popularity on Pinterest and social media because people want looks that feel natural and wearable instead of stiff and over-styled. Here is why messy braids keep showing up:
- They work on almost every hair type, including straight, wavy, curly and thick hair.
- They hide second-day hair, so they save time and shampoo.
- They suit both casual and formal events, from college to a wedding.
- They photograph beautifully, which is why bridal, festive and “clean girl” boards are full of them.
- They are easy to personalise with ribbons, pearls, flowers, jewellery pins and loose face-framing strands.
Trend notes to keep in mind: the popular direction right now is soft and lived-in rather than tight and perfect. Think face-framing strands, pulled-out braid loops for volume, and small accessories like pearl pins or fresh flowers. Trends change quickly, so check Pinterest Trends and the search suggestions in the Pinterest search bar for your own season and region before you create pins.
Quick Comparison Table: Pick Your Messy Braid in 10 Seconds
| Look | Best For | Difficulty | Time | Hair Length Needed | Key Trick |
|---|---|---|---|---|---|
| Classic messy braid ideas | Daily, college, office | Easy | 5 to 8 min | Shoulder length and up | Pancake the braid |
| Messy braid for long hair | Dates, parties, travel | Easy to medium | 8 to 12 min | Mid-back and up | Side-swept loose fishtail |
| Messy braid for wedding | Brides, bridesmaids, guests | Medium | 20 to 30 min | Mid-length and up | Low braid with pins and flowers |
| Messy braid front look | Photos, selfies, video calls | Easy | 5 to 10 min | Shoulder length and up | Braid over one shoulder with face-framing strands |
| Messy braid on lehnga | Eid, mehndi, shaadi, festivals | Medium | 15 to 25 min | Mid-back and up | Side braid with jewellery or gajra |
| Messy braid for curly hair | Curls, waves, frizz-prone hair | Easy | 10 to 15 min | Any length | Braid on damp, defined curls |
Before You Start: The 5-Minute Prep That Makes Every Braid Look Better
Most people skip this, and it is the real difference between a messy braid that looks stylish and one that just looks untidy.
- Start with second-day hair if you can. Freshly washed hair is too slippery. If your hair is clean, add a little dry shampoo or texture spray at the roots and mid-lengths.
- Brush out all knots first. A messy braid should look relaxed, not tangled.
- Add grip. Lightly mist texture spray or sea salt spray through the hair. If you have neither, a tiny bit of hairspray on your palms works too.
- Keep these tools ready: a soft hair tie or clear elastic, bobby pins matching your hair colour, a tail comb, and a light hairspray.
- Decide your finish. Do you want soft and romantic, or boho and voluminous? This choice decides how much you pull out later.
Pro tip: Do not pull the braid apart until the very last step. Pulling too early is what makes messy braids fall apart.
Look 1: Classic Messy Braid Hairstyle Ideas for Everyday Glow Up
This is the base technique. Master it and every other look in this post becomes easy.
What you need: hair tie, texture spray, tail comb.
Step by step:
- Add texture. Spray the roots and lengths lightly. This gives the braid grip and a fuller, undone look.
- Create a rough side part or leave it centred. A deep side part gives a fuller, more glamorous result.
- Gather all hair over one shoulder. This keeps the braid in front, where it can be seen, and gives you better control.
- Divide into three equal sections. Equal sections give an even braid. Do not be too precise, though, since messy is the goal.
- Braid loosely. Cross the right section over the middle, then the left over the middle, and repeat. Keep your hands relaxed. A tight braid cannot become messy.
- Stop about 2 to 3 inches from the ends and tie off. Use a soft elastic so the braid does not look severe.
- Pancake the braid. Hold the braid near the bottom with one hand, then gently tug the outer edges of each loop sideways with the other hand, working upward. This widens the braid and makes it look much thicker.
- Pull out face-framing strands. Gently tug a few thin pieces near your ears and temples.
- Finish with a light mist of hairspray.
Make it a glow up: Wrap a small section of hair around the elastic to hide it, or tie a silk ribbon in a bow at the bottom.
Look 2: Messy Braid Hairstyle for Long Hair (The Suspense Look)
Long hair is perfect for dramatic braids, but it can also look heavy and flat. Here is the version that looks expensive without any hard technique.
The mistake that ruins most long-hair messy braids: braiding all the way to the roots with a tight grip, then pulling the braid apart. This causes a flat top and a stringy bottom. The fix is simple, and it is in step 4.
What you need: elastic, texture spray, bobby pins, tail comb.
Step by step:
- Add volume at the crown. Lightly backcomb 2 to 3 small sections at the top of your head, then smooth only the surface layer over them.
- Gather hair into a low side ponytail and tie it loosely near the nape of your neck, resting over one shoulder.
- Divide the ponytail into three sections and begin a fishtail or regular braid. A fishtail looks more detailed on long hair. To do it, split the hair into two sections, then take a thin piece from the outer edge of one side and cross it over to join the other side, and repeat.
- Keep the braid loose from the very first stitch. This is the key fix. Loose from the start means you can pull it apart evenly later.
- Secure the end with a small elastic near the tips.
- Pancake from the bottom upward. Gently tug every loop until the braid looks thick and soft.
- Hide the top elastic. Take a small section of hair from the braid and wrap it around the elastic, then pin it in place underneath.
- Frame the face. Pull two thin strands forward at each side.
Style variations for long hair:
- Boho twist: Weave a thin braid into the main braid.
- Pearl look: Slide 3 to 5 pearl pins along the braid.
- Half-up version: Braid only the top half and leave the rest loose.
Look 3: Messy Braid Hairstyle for Wedding (Bride, Bridesmaid and Guest)
Wedding hair has to last for hours, survive hugging, dancing and photos, and still look soft. That means structure under the mess.
What you need: bobby pins (at least 15), U-pins if you have them, hairspray, texture spray, fresh flowers or hair accessories, tail comb, small clear elastics.
Step by step:
- Prep with grip. Add texture spray before you do anything else. Hair styled while very smooth will slip out of pins.
- Curl or wave the hair first (optional but recommended). Loose waves create a fuller braid and make the final look romantic.
- Create a base. Take a section from the top and loosely pin it at the back of your head for lift.
- Gather the rest into a low ponytail at the nape, slightly off-centre for a softer look.
- Braid the ponytail loosely into a three-strand braid and tie off the ends.
- Pancake the braid as in Look 1, but do not overdo it. Wedding braids should look full, not shaggy.
- Pin it into a low bun or curved shape. Wrap the braid into a low bun or tuck it into a loose loop, then secure it with bobby pins. Place pins in an X shape so they hold firmly.
- Pull out soft strands around the face and curl them lightly if needed.
- Add the finishing touches. Tuck in fresh flowers, baby’s breath, pearl pins or a decorative clip.
- Lock it in. Finish with a medium-hold hairspray, spraying from about 10 inches away.
Bridal tips:
- Do a trial run at least a week before the event.
- Take a photo from all angles so your stylist or helper can recreate it.
- Keep spare pins in your bag for touch-ups.
- Match accessories to your outfit, jewellery and venue.
Look 4: Messy Braid Hairstyle Front Look (Made for Photos and Selfies)
The front view is what everyone sees on a video call, in a selfie or in a photo, so this look focuses on the face frame.
What you need: elastic, tail comb, light-hold hairspray, small hair clip.
Step by step:
- Make a defined part. A side part adds shape. A middle part gives a softer, youthful look.
- Pull two face-framing sections from the front and set them aside. These will frame your face later.
- Gather the rest of the hair over one shoulder so the braid shows in front.
- Braid loosely down the length and tie off with a soft elastic.
- Pancake the braid to add width.
- Style the face-framing strands. Curl them away from your face or leave them straight, depending on your face shape.
- Add one accessory. A claw clip, small pearl clip or ribbon at the bottom looks great in photos.
- Check the angle. Take a quick selfie. If the braid looks too flat, pull the loops out a little more.
Face shape quick guide:
- Round face: Keep volume at the crown and leave longer face-framing strands.
- Square face: Soft curls near the jawline help soften angles.
- Long face: Add side volume and choose a lower braid.
- Heart-shaped face: Side-swept strands balance the forehead.
Look 5: Messy Braid Hairstyle on Lehnga (Festive and Shaadi Ready)
A lehnga needs hair that complements the heavy detail of the outfit, not one that competes with it. The side braid is the most popular choice because it keeps the neckline and jewellery visible.
What you need: elastics, bobby pins, texture spray, gajra or flowers (optional), hair jewellery, hairspray.
Step by step:
- Check your outfit first. If your dupatta is pinned on one shoulder, braid on the opposite side so nothing clashes.
- Add texture and lift. Backcomb the crown lightly for height. A little volume is very flattering with festive outfits.
- Create a deep side part for a glamorous look.
- Sweep all hair to one side and start braiding at the nape, keeping it loose.
- Braid fully and tie off with a small elastic.
- Pancake the braid so it looks thick enough to hold up next to embroidery and jewellery.
- Add the details. Weave gajra, a flower string or a hair chain through the braid and pin it every few inches for security.
- Pull out soft strands at the front and keep them light.
- Set with hairspray so the braid survives dancing and photographs.
Style it to match:
- Heavy bridal lehnga: Choose a thicker braid with flowers or a matha patti.
- Light pastel lehnga: Try a soft braid with pearls.
- Mehndi function: A loose braid with fresh flowers or colourful ribbon fits the vibe.
- Eid look: Add a small jewelled clip and a sleek centre part for a polished finish.
Look 6: Messy Braid Hairstyle for Curly Hair
Curly hair is made for messy braids because the natural texture already provides grip and volume. The goal is to protect your curl pattern, not fight it.
What you need: leave-in conditioner or curl cream, wide-tooth comb, soft scrunchie or elastic, light gel or mousse, hair clips.
Step by step:
- Start with damp or lightly refreshed curls. Mist with water if your curls have lost definition.
- Apply curl cream or leave-in conditioner with the praying hands method: smooth it down the hair with flat palms.
- Detangle gently with a wide-tooth comb or your fingers. Never brush dry curls.
- Section the hair into three large parts. Curly hair is easier to braid in big, loose sections.
- Braid loosely. Tight braids stretch and flatten curls. Keep your hands light.
- Tie off with a soft scrunchie rather than a thin elastic, which can cause breakage.
- Gently fluff the braid. Skip pancaking if your curls are tight. Instead, tug very lightly at the sides or leave the braid as is.
- Let it dry fully. Air dry if possible, or use a diffuser on low heat.
- Take it out or style it. For an extra-voluminous look the next day, unravel the braid for beautiful defined waves, or keep it in for a relaxed braided style.
Curly hair rules:
- Avoid heavy brushing once your curls are set.
- Sleep with a silk or satin scrunchie or bonnet to prevent frizz.
- Use a gel with a light hold, since a stiff cast can make the braid look crunchy.
Common Messy Braid Mistakes (and Easy Fixes)
| Mistake | Why It Happens | Quick Fix |
|---|---|---|
| Braid looks flat and thin | Braided too tightly or did not pancake | Tug loops sideways, starting from the bottom |
| Braid falls apart | Hair too clean and slippery | Add texture spray or dry shampoo first |
| Looks untidy, not stylish | Too many random flyaways | Pull out only 2 to 4 face-framing strands |
| Visible elastic | Not hidden | Wrap a hair section around it and pin |
| Braid slides down | Weak base | Add a small pinned base or backcomb at the crown |
| Frizzy curls | Brushed dry curls | Detangle with product and a wide-tooth comb |
| Heavy at the back of the head | Braid placed too low | Position it higher or add crown lift |
Hair Accessories That Instantly Level Up a Messy Braid
- Silk ribbon or scarf: adds colour and a soft, feminine feel.
- Pearl pins: elegant and perfect for weddings.
- Flowers and gajra: ideal for festive and traditional looks.
- Claw clips and mini clips: trendy, practical and good for casual styles.
- Hair jewellery and chains: great with ethnic wear and statement outfits.
- Scrunchies: a soft, relaxed finish for everyday glow-up looks.
How to Make a Messy Braid Last All Day
- Start with texture, not slick hair.
- Use bobby pins in a cross pattern for security.
- Spray hairspray lightly in layers instead of one heavy coat.
- Avoid touching your braid again and again.
- Carry a mini comb and a few pins for touch-ups.
Frequently Asked Questions
How do I make a messy braid look thicker? Pancake it. Gently stretch the outer edges of each loop outward, from the bottom to the top. Back-combing the roots slightly before braiding also helps.
Can I do a messy braid on short hair? Yes. Shoulder-length hair works well with a loose side braid or a small braid on one side. Add a few pins to hold shorter layers in place.
What is the easiest messy braid for beginners? The classic three-strand side braid from Look 1. Keep it loose and pancake it for a fuller look.
Is a messy braid good for second-day hair? It is one of the best styles for it, because the natural texture and oil give the braid grip.
How long does a messy braid hairstyle take? Most take 5 to 15 minutes. Wedding styles with pinning take longer, around 20 to 30 minutes.
Will a messy braid damage my hair? Not if you braid loosely and use soft elastics. Tight, repeated braiding on the same spot can cause breakage.